

Contents
Accessing VSTS
Creating an Epic
Creating a Feature
Creating a PBI
Best Practices to follow for a PBI

Feature details should be as follows:
Accessing VSTS
Creating an Epic
Creating a Feature
Creating a PBI
Best Practices to follow for a PBI
Accessing VSTS
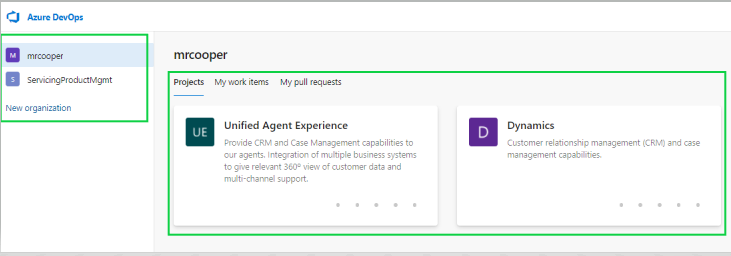
Follow the below steps to access VSTS and to locate the Organization and Project space the Product Backlog Items (PBIs), Features, and Epics will be documented within:- Access VSTS
- Select the Organization and Project you will be working on
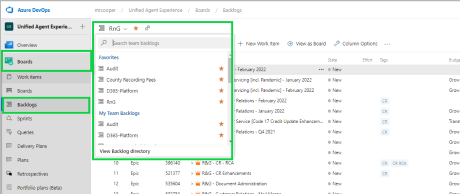
- From here there are multiple ways to navigate to the Board you will be working in. One path is as below:
- On the left-hand menu select Boards and then Backlogs. This will take you to project backlogs within your organization.
- Use the dropdown shown below to change projects as necessary.
- On the left-hand menu select Boards and then Backlogs. This will take you to project backlogs within your organization.
Creating an Epic
To create an Epic, follow the below steps:- Select New Work Item from the top row navigation and enter the Epic Title you wish to use.
- You can choose to add the new Epic to the top, bottom or at the selection your cursor was previously on of the backlog
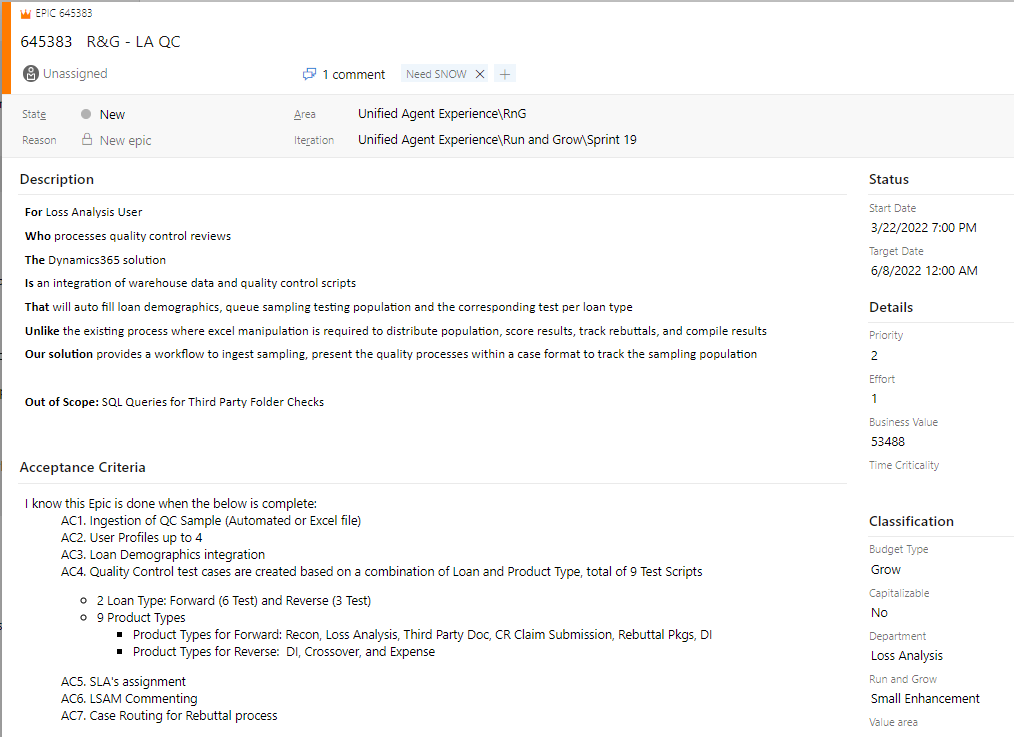
- Locate your new Epic and click on the Title to open. Here you will add details of the entire Epic that is being created. This should encompass what each Feature and PBI within the Epic will cover but from a very high level and basic explanation.
- Verify the Area and Iteration are accurate
- Add a Description using the below format:
- For: (business unit or role)
- Who: (what they do that is being created/changed/enhanced)
- The: (name of system where creation/change/enhancement is taking place)
- Is: (what the solution will do)
- That: (what the change/enhancement will do)
- Unlike: (current problem/missing functionality)
- Our solution: (benefit)
- Out of Scope: (list anything out of scope for the initiative) *optional
- Add Acceptance Criteria (AC) using the below format:
- I know this Epic is complete when:
- AC1: (brief description of one Feature)
- AC2 and on: (brief description of each additional Feature using one AC per Feature)
- I know this Epic is complete when:
- Complete the Budget Type, Capitalizable, Department and Run and Grow fields
- Add the Start Date, Target Date, Priority, Effort, Business Value and Value Area as soon as they are known
Creating a Feature
There are multiple ways to create a Feature:- Within an Epic, on the right-hand side click the drop down by Add Link and select New Item
- The Link Type should be Child and the Work Item Type will be Feature
- Enter the Title you wish to use for the Feature and click OK
- When viewing the Backlog Epics, locate the Epic you wish to create a new Feature for and click on the + to the left of the Epic
- Enter the required information and save
Feature details should be as follows:
- Title
- Confirm you are using the agreed-upon naming convention particularly when there are multiple Epics within a project that contain Features
- Verify the Area and Iteration are accurate
- Add a Description using the below format:
- As a: (user title or role)
- I want: (the user description of what is being created/changed/enhanced)
- So that: (the gain the user is receiving due to what is being created/changed/enhanced)
- Out of Scope: (list anything out of scope for the initiative) *optional
- Add Acceptance Criteria (AC) using the below format:
- I know this Feature is complete when:
- AC1: (brief description of one PBI within the Feature)
- AC2 and on: (brief description of each additional PBI using one AC per PBI)
- I know this Feature is complete when:
- Complete the Budget Type, Capitalizable, Department and Run and Grow fields
- Add the Start Date, Target Date, Priority, and Value Area as soon as they are known